
Appearance
本篇主要写一个物理碰撞效果的案例,能实现这类效果的库其实很多,我们可以总结下
物理特性库
3D 物理库
Ammo.js
- 官网:http://schteppe.github.io/ammo.js-demos/
- 仓库:https://github.com/kripken/ammo.js/
- 文档:https://github.com/kripken/ammo.js/#readme
- Bullet 一个使用 C++ 编写的物理引擎的 JavaScript 直接移植 包比较重量级,当前仍然由社区更新维护
Cannon.js
比 Ammo.js 更加轻量级,使用起来更舒服,主要由一个开发者维护,已经多年未更新,有一个维护的 fork 是 cannon-es
github资源cannon-es (opens new window):https://github.com/dreammonkey/cannon-es
cannon-es在线文档 (opens new window):https://pmndrs.github.io/cannon-es/docs/index.html
cannon-es在线案例 (opens new window):https://pmndrs.github.io/cannon-es/
Oimo.js
- 官网:https://lo-th.github.io/Oimo.js/
- 仓库:https://github.com/lo-th/Oimo.js
- 文档:http://lo-th.github.io/Oimo.js/docs.html
- 比 Ammo.js 轻量且更容易入手,主要由一个开发者维护,已经很久没有更新了
2D 物理库
Matter.js
- 官网:https://brm.io/matter-js/
- 仓库:https://github.com/liabru/matter-js
- 文档:https://brm.io/matter-js/docs/
- 主要由一个开发者维护,目前仍在更新中
P2.js
- 官网:https://schteppe.github.io/p2.js/
- 仓库:https://github.com/schteppe/p2.js
- 文档:http://schteppe.github.io/p2.js/docs/
- 主要由一个开发者维护,已经很久没有更新了
Planck.js
- 官网:https://piqnt.com/planck.js/
- 仓库:https://github.com/shakiba/planck.js
- 文档:https://github.com/shakiba/planck.js/tree/master/docs
- 主要由一个开发者维护,目前仍在更新中
Box2D.js
- 官网:http://kripken.github.io/box2d.js/demo/webgl/box2d.html
- 仓库:https://github.com/kripken/box2d.js/
- 文档:无
- 主要由一个开发者维护,目前仍在更新中
本篇文章主要介绍 cannon-es 库,因为它是一个比较轻量级的库,使用起来也比较简单,下面我们来介绍一下如何使用 cannon-es 库来实现一个物理碰撞效果
实现一个小球自由落体效果
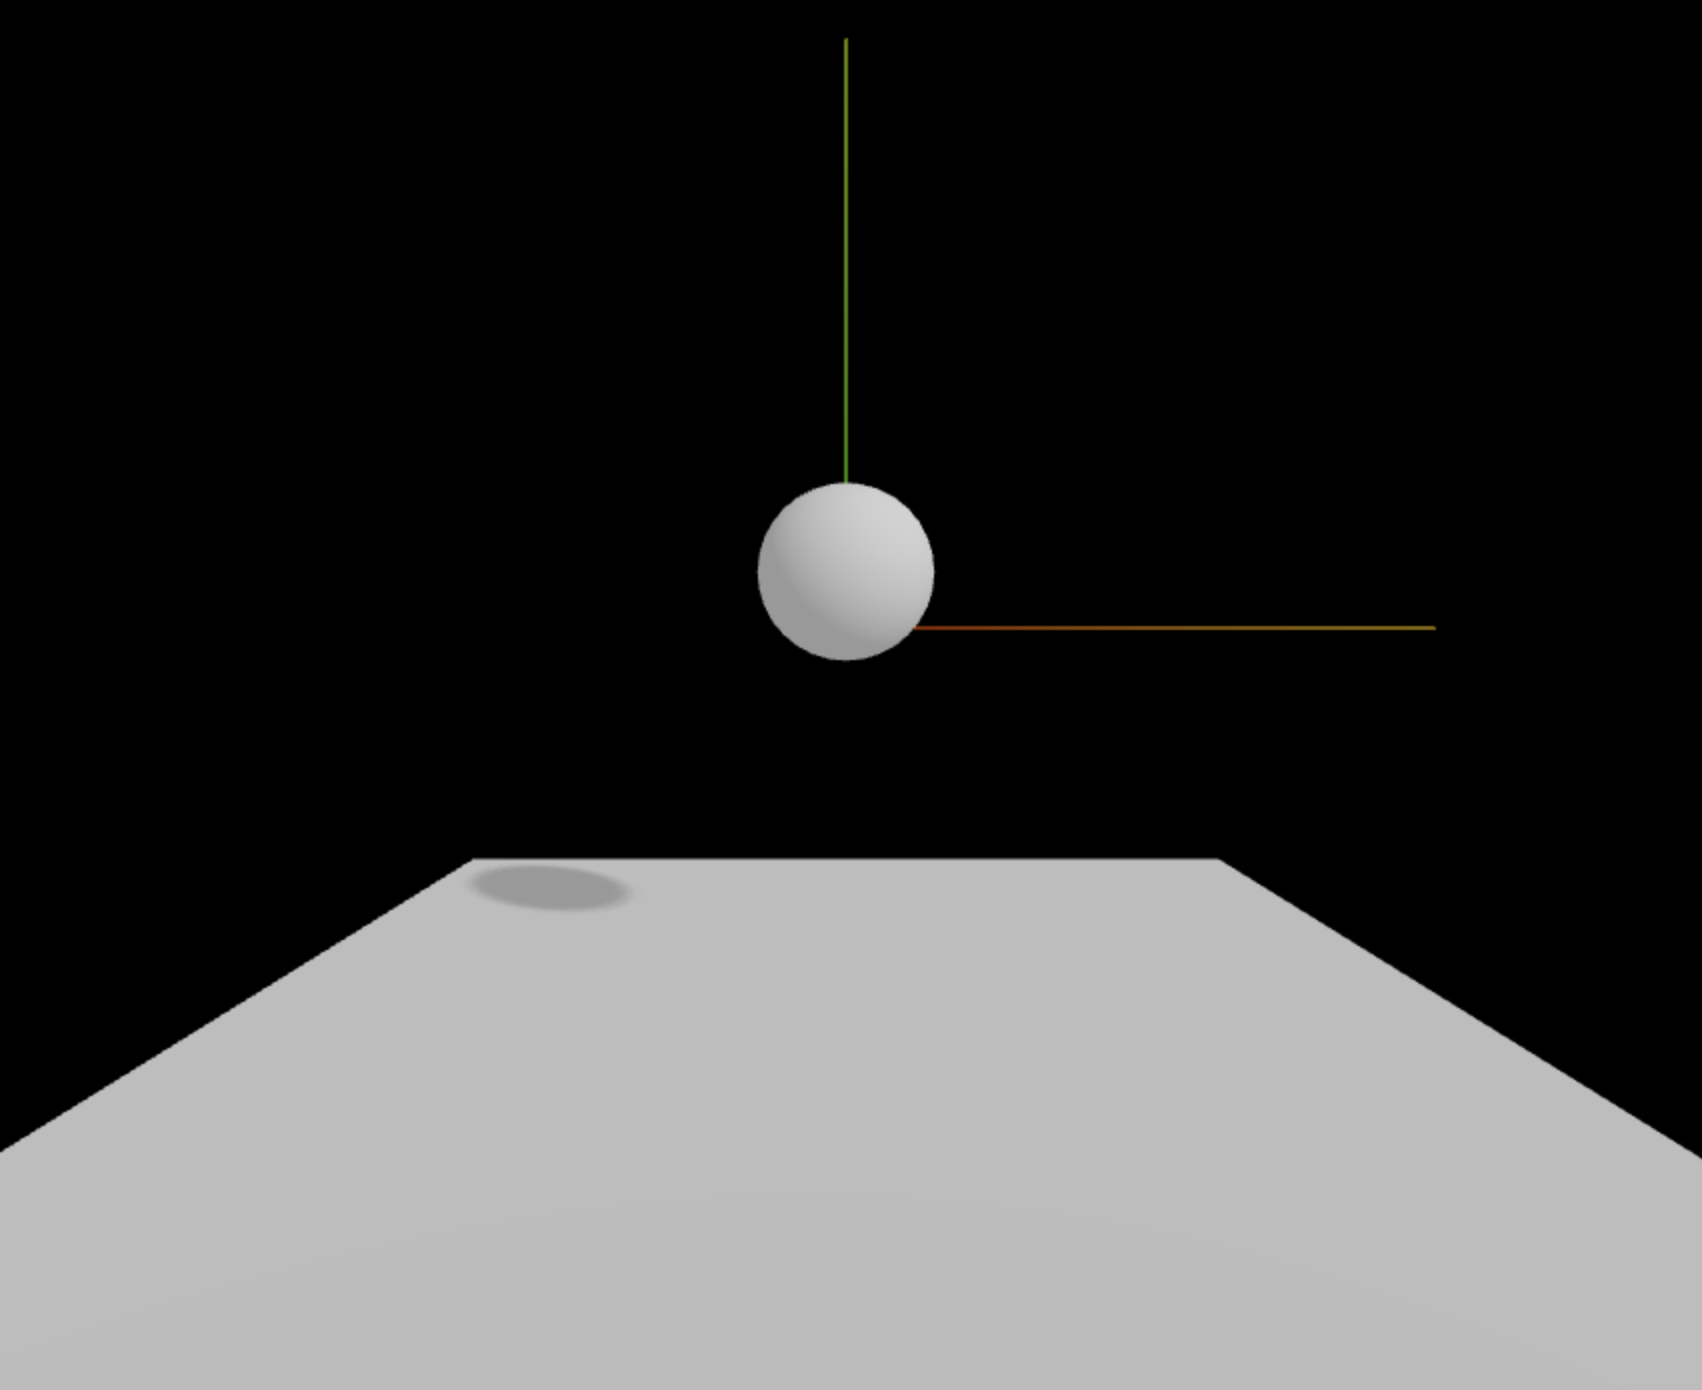
默认大家已经实现了一个这样的简单场景了,可以参考阴影案例
安装 cannon-es
bash
npm install cannon-es引入 cannon-es
js
import * as CANNON from 'cannon-es';创造物理世界
js
const world = new CANNON.World();设置物理世界重力加速度
这个数字不一定是重力加速度9.8,它是一个单位时间内的加速度,单位是 m/s²
如果发现小球掉落速度过慢或者过快记得来调节这个数字
js
world.gravity.set(0, -199.8, 0); //单位:m/s²创建物理小球并添加到物理世界
js
const sphereShape = new CANNON.Sphere(15); //单位:m
const bodyShape = new CANNON.Body({
  mass: 1, // 质量
  position: new CANNON.Vec3(0, 20, 0), // 位置
  shape: bodyShape, // 形状
})
world.addBody(bodyShape);
设置步长 这个数字越小,小球的运动就越平滑,但是也会影响性能 注意放在render函数才会有明显变化,因为每一帧都要调用才对吧
js
const timeStep = 1 / 60; // 单位:s
world.step(fixedTimeStep);
其实做到了这一步我们物理世界的小球已经运动起来了, 但是渲染的小球我们看还是停留在原地,这是因为我们还没有将物理世界的小球位置同步到渲染的小球位置
设置渲染小球位置
js
mesh.position.copy(body.position);ok 此时一个自由落体已经完成了,接下来在改进一下代码做一个地面碰撞弹跳的感觉吧
实现一个小球碰撞效果
首先 我们需要把地面也在物理世界中创建出来,然后设置一下地面的质量为0,因为0不会收到重力的影响 固定不动的
创建物理地面
js
// 物理地面
const groundBody = new CANNON.Body({
    mass: 0, // 质量为0,始终保持静止,不会受到力碰撞或加速度影响
    shape:new CANNON.Plane()
});
// 改变平面默认的方向,法线默认沿着z轴,旋转到平面向上朝着y方向
//旋转规律类似threejs 平面
groundBody.quaternion.setFromEuler(-Math.PI / 2, 0, 0);
// 设置位置 说白了物理世界中的位置要和渲染的位置保持一致
groundBody.position.set(0, -62, 0);
world.addBody(groundBody);
设置材质
给物理小球一个塑料材质,地面给个混凝土,这样碰撞起来比较明显
js
// 塑料材质
const sphereMaterial = new CANNON.Material('plastic');
//   创建刚体
const body = new CANNON.Body({
mass: 3, // 碰撞体质量3kg
position: new CANNON.Vec3(0, 20, 0),
shape: bodyShape, //碰撞体的几何体形状
material: sphereMaterial //碰撞体材质
});

// 混凝土材质
const groundMaterial = new CANNON.Material('concrete');
// 物理地面
const groundBody = new CANNON.Body({
mass: 0, // 质量为0,始终保持静止,不会受到力碰撞或加速度影响
shape: new CANNON.Plane(),
material: groundMaterial //地面材质
});
反弹恢复系数
restitution的范围一般是0~1之间选择一个值,一般弹性越大restitution的值也大,比如乒乓球相比橡皮泥反弹能力就更强。
js
const contactMaterial = new CANNON.ContactMaterial(groundMaterial, sphereMaterial, {
    restitution: 0.7, //反弹恢复系数
})
// 把关联的材质添加到物理世界中
world.addContactMaterial(contactMaterial)
ok 此时一个小球碰撞效果已经完成了
添加一个碰撞声音
这个其实就简单多了,我们只需要监听一下碰撞事件 collide,然后播放一下声音就可以了
js
const audio = new Audio('路径');
// 监听碰撞事件 加一个碰撞的声音
body.addEventListener('collide', (collision) => {
// 每次播放声音的时候,都要重新设置声音的播放位置
// 设置音量 和碰撞的力度有关系
const impactStrength = collision.contact.getImpactVelocityAlongNormal();
console.log(1111, impactStrength);
if (impactStrength > 60) {
    audio.currentTime = 0;
    audio.volume = impactStrength / 200;
    audio.play();
}
});
完整代码
html
<template>
  <div id="canvas"></div>
</template>

<script setup>
import * as THREE from 'three';
import * as CANNON from 'cannon-es';
import { onMounted } from 'vue';
import { OrbitControls } from 'three/addons/controls/OrbitControls.js';
import { GUI } from 'three/addons/libs/lil-gui.module.min.js';
import { useRoute } from 'vue-router';
const audio = new Audio('../../public/ziyuan/pengzhuang.mp3');

const route = useRoute();

onMounted(() => {
  const scene = new THREE.Scene();
  const gui = new GUI(); //创建GUI对象
  // 创建物理世界
  const world = new CANNON.World();

  // 设置物理世界重力加速度
  world.gravity.set(0, -199.8, 0); //单位:m/s²

  const bodyShape = new CANNON.Sphere(15);
  // 塑料材质
  const sphereMaterial = new CANNON.Material('plastic');
  //   创建刚体
  const body = new CANNON.Body({
    mass: 3, // 碰撞体质量3kg
    position: new CANNON.Vec3(0, 20, 0),
    shape: bodyShape, //碰撞体的几何体形状
    material: sphereMaterial //碰撞体材质
  });
  // 将刚体添加到物理世界
  world.addBody(body);

  // 监听碰撞事件 加一个碰撞的声音
  body.addEventListener('collide', (collision) => {
    // 每次播放声音的时候,都要重新设置声音的播放位置
    // 设置音量 和碰撞的力度有关系
    const impactStrength = collision.contact.getImpactVelocityAlongNormal();
    console.log(1111, impactStrength);
    if (impactStrength > 60) {
      audio.currentTime = 0;
      audio.volume = impactStrength / 200;
      audio.play();
    }
  });

  // 创建物理世界平面

  // 混凝土材质
  const groundMaterial = new CANNON.Material('concrete');
  // 物理地面
  const groundBody = new CANNON.Body({
    mass: 0, // 质量为0,始终保持静止,不会受到力碰撞或加速度影响
    shape: new CANNON.Plane(),
    material: groundMaterial //地面材质
  });

  // 改变平面默认的方向,法线默认沿着z轴,旋转到平面向上朝着y方向
  //旋转规律类似threejs 平面
  groundBody.quaternion.setFromEuler(-Math.PI / 2, 0, 0);

  // 和渲染的位置保持一致
  groundBody.position.set(0, -62, 0);

  world.addBody(groundBody);

  const contactMaterial = new CANNON.ContactMaterial(groundMaterial, sphereMaterial, {
    restitution: 0.7 //反弹恢复系数
  });
  // 把关联的材质添加到物理世界中
  world.addContactMaterial(contactMaterial);

  //创建一个长方体几何对象Geometry
  const sphere = new THREE.SphereGeometry(15);

  //材质对象Material
  const material = new THREE.MeshStandardMaterial();

  // 创建网格模型
  const mesh = new THREE.Mesh(sphere, material); //网格模型对象Mesh

  mesh.castShadow = true; // 网格模型投射阴影

  //设置网格模型在三维空间中的位置坐标,默认是坐标原点
  mesh.position.set(0, 20, 0);
  scene.add(mesh); //网格模型添加到场景中

  // 创建平面
  const geometry1 = new THREE.PlaneGeometry(200, 200);

  const material1 = new THREE.MeshStandardMaterial({});

  const plane = new THREE.Mesh(geometry1, material1);
  plane.position.set(0, -62, 0);

  //   设置物体接收阴影
  plane.receiveShadow = true;

  plane.rotation.x = -Math.PI / 2;
  scene.add(plane);

  // AxesHelper:辅助观察的坐标系
  const axesHelper = new THREE.AxesHelper(100);
  scene.add(axesHelper);

  /**
   * 光源设置
   */
  // tip: 环境光

  const ambient = new THREE.AmbientLight(0xffffff, 1);
  scene.add(ambient);

  // 平行光
  const directionalLight = new THREE.DirectionalLight(0xffffff, 1);
  directionalLight.position.set(100, 100, 100);
  directionalLight.lookAt(scene.position); // 让光源指向场景中心

  //   设置光照投射阴影
  directionalLight.castShadow = true;

  directionalLight.shadow.radius = 10;
  directionalLight.shadow.mapSize.set(2048, 2048);

  directionalLight.shadow.camera.near = 1;
  directionalLight.shadow.camera.far = 1000;
  directionalLight.shadow.camera.left = -200;
  directionalLight.shadow.camera.right = 200;
  directionalLight.shadow.camera.top = 200;
  directionalLight.shadow.camera.bottom = -200;
  // 平行光子菜单
  const dirFolder = gui.addFolder('平行光');
  dirFolder.close(); //关闭菜单
  // 平行光位置
  dirFolder.add(directionalLight.position, 'x', -300, 300);
  dirFolder.add(directionalLight.position, 'y', -300, 300);
  dirFolder.add(directionalLight.position, 'z', -300, 300);

  //   const dirLightHelper = new THREE.DirectionalLightHelper(directionalLight, 5, 0xff0000);
  //   scene.add(dirLightHelper);

  scene.add(directionalLight);

  // width和height用来设置Three.js输出的Canvas画布尺寸(像素px)
  const width = window.innerWidth; //宽度
  const height = window.innerHeight; //高度

  /**
   * 透视投影相机设置
   */
  // 75:视场角度, width / height:Canvas画布宽高比, 1:近裁截面, 3000:远裁截面
  const camera = new THREE.PerspectiveCamera(75, width / height, 1, 3000);
  camera.position.set(0, 0, 172); //相机在Three.js三维坐标系中的位置
  camera.lookAt(0, 0, 0); //相机观察目标指向Three.js坐标系原点

  /**
   * 创建渲染器对象
   */
  const renderer = new THREE.WebGLRenderer({
    antialias: true //开启锯齿
  });
  // 设置渲染器开启阴影的计算
  renderer.shadowMap.enabled = true;

  renderer.setSize(width, height); //设置three.js渲染区域的尺寸(像素px)
  const controls = new OrbitControls(camera, renderer.domElement);
  document.getElementById('canvas').appendChild(renderer.domElement);

  function render() {
    renderer.render(scene, camera); //执行渲染操作
    // console.log('球位置', body.position);
    // console.log('球速度', body.velocity);
    // console.log('y方向球位置', body.position.y);
    world.step(1 / 60); //更新物理计算

    // 更新网格模型 将刚体的位置同步小球
    mesh.position.copy(body.position);

    // 查看相机位置 调整到一个合适的地方
    // console.log('camera.position',camera.position);
    requestAnimationFrame(render); //请求再次执行渲染函数render,渲染下一帧
  }
  render();
  // 画布跟随窗口变化
  window.onresize = function () {
    renderer.setSize(window.innerWidth, window.innerHeight);
    camera.aspect = window.innerWidth / window.innerHeight;
    camera.updateProjectionMatrix();
  };
});
</script>
创建一个长方体下落效果
下面做个别的小案例,点击页面不停的掉一些长方体
注意⚠️ 换个几何体大多数逻辑都是保持一致的,只是几何体的形状不一样而已,但是长方体的宽高深度是不一样的,所以需要注意一下
Cannon.js 中创建Box 与 Three.js 创建 Box 不同,在 Three.js 中,创建几何体BoxBufferGeometry 只需要直接提供立方体的宽高深就行,但是在Cannon.js中,它是根据立方体对角线距离的一半来计算生成形状,因此其宽高深必须乘以0.5。
点击生成多个几何体
其实这一步的关键就是我们把物理世界和渲染世界的几何体一起存到一个数组中去,在render的时候去同步他们就可以简单的完成这个效果了
完整代码
html
<template>
  <div id="canvas"></div>
</template>

<script setup>
import * as THREE from 'three';
import * as CANNON from 'cannon-es';
import { onMounted } from 'vue';
import { OrbitControls } from 'three/addons/controls/OrbitControls.js';
import { GUI } from 'three/addons/libs/lil-gui.module.min.js';
import { useRoute } from 'vue-router';

const route = useRoute();

onMounted(() => {
  const scene = new THREE.Scene();
  const gui = new GUI(); //创建GUI对象
  // 创建物理世界
  const world = new CANNON.World();

  // 设置物理世界重力加速度
  world.gravity.set(0, -199.8, 0); //单位:m/s²

  // 塑料材质
  const sphereMaterial = new CANNON.Material('plastic');

  function getRandomAngle(min = 0, max = Math.PI * 2) {
    return Math.random() * (max - min) + min;
  }

  const arr = [];

  const createBox = (width, height, depth, position) => {
    const bodyShape = new CANNON.Box(new CANNON.Vec3(width * 0.5, height * 0.5, depth * 0.5));

    //   创建刚体
    const body = new CANNON.Body({
      mass: 3, // 碰撞体质量3kg
      position: position,
      shape: bodyShape, //碰撞体的几何体形状
      material: sphereMaterial //碰撞体材质
    });
    // body.rotation.set(rotationVec3) ;
    const x = getRandomAngle();
    const y = getRandomAngle();
    const z = getRandomAngle();
    console.log(1111, x, y, z);
    body.quaternion.setFromEuler(x, y, z);

    // quaternion.setFromEuler(x, y, z);

    // 将刚体添加到物理世界
    world.addBody(body);

    // 渲染世界的长方体

    //创建一个长方体几何对象Geometry
    const boxGeometry = new THREE.BoxGeometry(width, height, depth);

    //材质对象Material
    const material = new THREE.MeshStandardMaterial();

    // 创建网格模型
    const mesh = new THREE.Mesh(boxGeometry, material); //网格模型对象Mesh

    mesh.castShadow = true; // 网格模型投射阴影

    //设置网格模型在三维空间中的位置坐标,默认是坐标原点
    mesh.position.set(position);

    // 网格箱子旋转
    // 设置箱子下落的初始姿态角度
    // mesh.rotation.set(x, y, z);
    // mesh.rotation.set(rotationVec3);
    scene.add(mesh); //网格模型添加到场景中

    arr.push({
      mesh: mesh,
      body: body
    });
  };

  createBox(getRandomAngle(10, 30), getRandomAngle(10, 30), getRandomAngle(10, 30), new CANNON.Vec3(0, 20, 0));

  document.body.addEventListener('click', () => {
    createBox(getRandomAngle(10, 30), getRandomAngle(10, 30), getRandomAngle(10, 30), new CANNON.Vec3(0, 20, 0));
  });

  // 创建物理世界平面
  // 混凝土材质
  const groundMaterial = new CANNON.Material('concrete');
  // 物理地面
  const groundBody = new CANNON.Body({
    mass: 0, // 质量为0,始终保持静止,不会受到力碰撞或加速度影响
    shape: new CANNON.Plane(),
    material: groundMaterial //地面材质
  });

  // 改变平面默认的方向,法线默认沿着z轴,旋转到平面向上朝着y方向
  //旋转规律类似threejs 平面
  groundBody.quaternion.setFromEuler(-Math.PI / 2, 0, 0);

  // 和渲染的位置保持一致
  groundBody.position.set(0, -62, 0);

  world.addBody(groundBody);

  world.broadphase = new CANNON.SAPBroadphase(world);
  world.allowSleep = true;

  const contactMaterial = new CANNON.ContactMaterial(groundMaterial, sphereMaterial, {
    restitution: 0.7 //反弹恢复系数
  });
  // 把关联的材质添加到物理世界中
  world.addContactMaterial(contactMaterial);

  // 创建平面
  const geometry1 = new THREE.PlaneGeometry(200, 200);

  const material1 = new THREE.MeshStandardMaterial({});

  const plane = new THREE.Mesh(geometry1, material1);
  plane.position.set(0, -62, 0);

  //   设置物体接收阴影
  plane.receiveShadow = true;

  plane.rotation.x = -Math.PI / 2;
  scene.add(plane);

  // AxesHelper:辅助观察的坐标系
  const axesHelper = new THREE.AxesHelper(100);
  scene.add(axesHelper);

  /**
   * 光源设置
   */
  // tip: 环境光

  const ambient = new THREE.AmbientLight(0xffffff, 1);
  scene.add(ambient);

  // 平行光
  const directionalLight = new THREE.DirectionalLight(0xffffff, 1);
  directionalLight.position.set(100, 100, 100);
  directionalLight.lookAt(scene.position); // 让光源指向场景中心

  //   设置光照投射阴影
  directionalLight.castShadow = true;

  directionalLight.shadow.radius = 10;
  directionalLight.shadow.mapSize.set(2048, 2048);

  directionalLight.shadow.camera.near = 1;
  directionalLight.shadow.camera.far = 1000;
  directionalLight.shadow.camera.left = -200;
  directionalLight.shadow.camera.right = 200;
  directionalLight.shadow.camera.top = 200;
  directionalLight.shadow.camera.bottom = -200;
  // 平行光子菜单
  const dirFolder = gui.addFolder('平行光');
  dirFolder.close(); //关闭菜单
  // 平行光位置
  dirFolder.add(directionalLight.position, 'x', -300, 300);
  dirFolder.add(directionalLight.position, 'y', -300, 300);
  dirFolder.add(directionalLight.position, 'z', -300, 300);

  //   const dirLightHelper = new THREE.DirectionalLightHelper(directionalLight, 5, 0xff0000);
  //   scene.add(dirLightHelper);

  scene.add(directionalLight);

  // width和height用来设置Three.js输出的Canvas画布尺寸(像素px)
  const width = window.innerWidth; //宽度
  const height = window.innerHeight; //高度

  /**
   * 透视投影相机设置
   */
  // 75:视场角度, width / height:Canvas画布宽高比, 1:近裁截面, 3000:远裁截面
  const camera = new THREE.PerspectiveCamera(75, width / height, 1, 3000);
  camera.position.set(0, 0, 172); //相机在Three.js三维坐标系中的位置
  camera.lookAt(0, 0, 0); //相机观察目标指向Three.js坐标系原点

  /**
   * 创建渲染器对象
   */
  const renderer = new THREE.WebGLRenderer({
    antialias: true //开启锯齿
  });
  // 设置渲染器开启阴影的计算
  renderer.shadowMap.enabled = true;

  renderer.setSize(width, height); //设置three.js渲染区域的尺寸(像素px)
  const controls = new OrbitControls(camera, renderer.domElement);
  document.getElementById('canvas').appendChild(renderer.domElement);

  function render() {
    renderer.render(scene, camera); //执行渲染操作

    world.step(1 / 60); //更新物理计算

    for (const element of arr) {
      // 更新网格模型 将刚体的位置同步小球
      element.mesh.position.copy(element.body.position);

      element.mesh.quaternion.copy(element.body.quaternion);
    }

    // 查看相机位置 调整到一个合适的地方
    // console.log('camera.position',camera.position);
    requestAnimationFrame(render); //请求再次执行渲染函数render,渲染下一帧
  }
  render();
  // 画布跟随窗口变化
  window.onresize = function () {
    renderer.setSize(window.innerWidth, window.innerHeight);
    camera.aspect = window.innerWidth / window.innerHeight;
    camera.updateProjectionMatrix();
  };
});
</script>